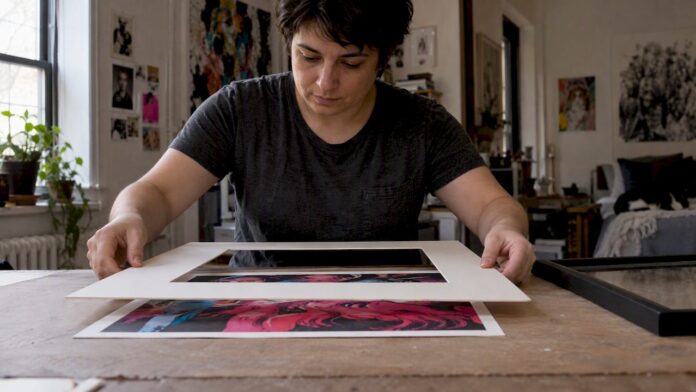
Yes, you can frame art prints at home and get results that look professional and last for years. Prioritize an acid-free mat that keeps the print off the glazing, then choose UV-filtering glazing if the piece matters to you, and cut mat openings about a quarter inch smaller than the artwork on each side. The Library of Congress, CCAHA, and FramingMath all back this approach. If you’d rather skip the process altogether, ready-made prints are an option worth considering too.
TL;DR:
- Choose mat board without acidic materials and hinge only along the top with reversible methods; keep adhesive off the print so paper can expand.
- Standard glass offers clearer optics, while acrylic weighs less and resists shattering; UV filtering glazing costs more and suits prints that cannot be replaced.
- Check frame depth before buying, because the space must fit glazing, mat, print, and backing without pressing artwork against glass.
- Keep prints with UV filtering glazing away from direct sun and heat sources; it slows color loss but cannot prevent damage.
Table of Contents
We think the biggest mistake people make is grabbing whatever frame looks nice at the store without checking its depth. A frame needs enough room behind the glazing for a mat, the print, and a backing board, or everything gets squeezed and your print can end up pressed against the glass.
Lignin breaks down over time and yellows paper, so this choice protects your print more than almost anything else you’ll buy. For glazing, you’re choosing between standard glass, acrylic, or UV-filtering versions of either, each with its own tradeoffs we’ll cover below. Acid-free foam board or archival corrugated board works well for backing, and wire with screw eyes or D-rings handles the hanging.
- Ruler and measuring tape for accurate dimensions
- Craft knife and metal straightedge for trimming
- A mat cutter, or a local frame shop that will cut mats to your measurements
- Cotton gloves to keep oils off the print surface
Pro Tip: If you only upgrade one thing, make it the mat board. It’s an affordable way to help protect your print.
How do you measure your print and calculate the mat opening?
Conservators measure the image area itself, not the paper margins. A print with a white border looks different once matted if you measure the paper edge instead of where the actual image stops.
The standard formula comes from FramingMath: the mat opening equals your artwork size minus twice the overlap. A default overlap of 0.25 inches per side works for most prints, while full-bleed images or smaller prints often call for an eighth of an inch instead so you don’t crop too much of the image.
- Measure the image height and width at their widest points.
- Subtract 0.5 inches total (0.25 inches per side) from each dimension for your mat opening, or 0.25 inches total if using the eighth-inch overlap.
- If opposite edges measure slightly differently, work from the smaller number so the opening stays centered.
- Mark your cut lines twice before you cut once.
For example: an 11 by 14 inch print with a standard quarter-inch overlap needs a mat opening of 10.5 by 13.5 inches, according to the overlap formula. That small margin is what holds the print securely without hiding any of the image.
How do you attach or hinge a print without damaging it?
The mat isn’t just decorative. It’s what physically holds your print off the glazing, which matters because condensation or direct contact with glass can stick to or warp paper over time.
Conservation guidance from CCAHA recommends hinging methods that are fully reversible, meaning you could remove the print later without leaving marks or residue behind.
- Mulberry paper hinges applied with wheat starch paste, the standard conservation choice
- Polyester film corners that hold the print without any adhesive touching the image
- Archival photo corners, a simple option for prints you may want to swap out later
Place hinges along the top edge only, and let the print hang freely below rather than pinning it on all four sides, since paper expands and contracts with humidity. Never let glue, tape, or adhesive touch the front or back of the image itself. If your frame is shallow, add a spacer or a slightly thicker back mat to increase the gap between print and glazing.
Pro Tip: Hinge from the top edge only. A print that’s glued or taped on all sides has nowhere to go when humidity shifts, and that’s when buckling starts.
Should you choose glass, acrylic, or UV-filtering glazing?
This is where budget and location both matter. Standard glass gives you the clearest optical quality but filters very little ultraviolet light, which means colors can fade with regular sun exposure. Acrylic weighs less and resists shattering, making it the better pick for large pieces, bedrooms, or anywhere children are nearby, though it scratches more easily than glass.
Research on framing materials suggests spending your money on the acid-free mat first, since that’s doing most of the preservation work, and adding UV-filtering glazing second if the print is one you couldn’t easily replace.
- Standard glass: best optics, minimal UV protection, heavier and more fragile
- Acrylic: lightweight, shatter-resistant, scratches more easily
- UV-filtering glazing (glass or acrylic): slows fading, costs more, worth it for irreplaceable pieces
Even with UV-filtering glazing in place, keep framed prints out of direct sunlight. Glazing slows fading; it doesn’t stop it entirely.
How do you assemble and hang a framed print safely?
Once your materials are ready, assembly is mostly a matter of layering things in the right order and double-checking fit before you seal anything shut.
- Lay the glazing down first and clean both sides thoroughly.
- Place the hinged print and mat on top, checking that no part of the image touches the glazing.
- Add the backing board behind the print to hold everything flat.
- Secure the package into the frame with points, brads, or a dust cover, whichever your frame style uses.
- Attach hanging hardware: wire with screw eyes works for most frames, while D-rings are sturdier for anything heavy.
Skip saw-tooth hangers on larger or heavier frames. They’re convenient but tend to let frames tilt or slip off the wall over time. Hang finished pieces on interior walls away from heating vents, radiators, and windows with direct sun, and check periodically for shifting, moisture spots, or a frame that’s settled unevenly on its wire.
Pro Tip: Give the frame a gentle shake test on the wall before you walk away. If anything rattles inside, the backing isn’t seated tightly enough.
How should you style and maintain framed prints once they’re up?
A single print generally looks best with its center around average eye level. For a gallery wall, leave some space between frames and try to align either the tops, the centers, or a shared grid line so the grouping reads as intentional rather than scattered.
- Rotate displayed prints occasionally and store extras in archival sleeves to limit cumulative light exposure
- Dust glazing with a soft, dry cloth, and avoid ammonia-based glass cleaners that can degrade certain coatings
- Watch for warping, yellowing mat edges, or a print that’s shifted inside its window, all signs it’s time to reglaze or remount
If you’re decorating a shared or temporary space, our dorm decor guide covers low-damage ways to display art without harming walls.
Step-by-step guide to selecting and cutting custom mats at home
Pick your mat color based on the print, not the room. A warm white or soft cream generally reads better against most artwork than stark white, which can compete with lighter colors in the image.
Once you’ve measured your artwork using the overlap formula above, mark your mat board on the back side in pencil, using a right angle to confirm square corners. Score lightly along your marked lines with a mat cutter set to the board’s thickness, then follow through with firmer, even pressure rather than trying to cut the full depth in one pass. A beveled edge gives the opening a finished look and is standard on most pre-cut mats you’d buy at a shop.
Cut your window mat first, then use it as a template to measure the backing mat if you’re building a full matting package. Test-fit your print in the opening before committing to any adhesive or hinge placement, since a mat that’s even slightly too tight can crease the print’s edges over time.
If hand-cutting feels too risky for a print you care about, many local frame shops will cut mats to your exact specifications for a modest fee, which keeps the preservation choices in your hands while leaving the precision cutting to someone with a steady rig.
What common mistakes should you avoid when framing prints at home?
The most frequent error is skipping the mat altogether and letting the print sit flush against the glazing. Over time, humidity can cause the print to stick to the glass, and separating them later often damages the surface.
A close second is using non-archival mat board or foam core, both of which contain acids and lignin that migrate into paper and cause yellowing or brittleness within a few years. Taping a print down on all four edges is another common issue. It prevents the paper from expanding and contracting naturally, which leads to rippling or buckling inside the frame.
Measuring paper margins instead of the actual image area throws off your mat opening and can crop part of the artwork unintentionally. And hanging a heavy frame on a single saw-tooth hanger or a picture hook rated for a lighter load is a mistake that usually shows up as a tilted or fallen frame rather than an immediate problem.
Finally, placing framed prints across from a window or above a heat source accelerates fading and warping regardless of how good your materials are. Glazing and mats slow damage; they don’t eliminate the effects of direct sun or temperature swings.

Can you use DIY alternatives or upcycle old frames instead?
Secondhand and thrift store frames are often solid wood or metal and just need a fresh mat and backing to look new again. Check that the depth is adequate for a mat and backing board, and give the frame a light sanding and a coat of paint or stain if the finish feels dated.
If you have an odd-sized print that doesn’t fit standard frame dimensions, oversized mats with an off-center opening can make it work inside a more common frame size, which is often cheaper than ordering custom. Clip frames, which use spring clips or binder clips at the edges with a sheet of glass or acrylic, are a simple option for casual or rotating displays where museum-level preservation isn’t the priority.
For a more relaxed look, washi tape or removable mounting strips can hold a print directly to the wall without any frame, though this skips the protective benefits a mat and glazing provide and works best for prints you’re comfortable replacing. Whichever route you choose, the acid-free mat and UV consideration still apply if you want the print to last.
What I prioritize when framing and displaying my own work
When I’m getting a print ready to hang, the acid-free mat is non-negotiable for me. It’s the one material choice that quietly does the most protective work, and it costs very little compared to what it prevents. The second thing I think about is light. I’ve learned that even a print I love needs to come down off a sunny wall eventually, because fading happens slowly and you don’t notice until it’s too late. For readers who’d rather skip the cutting and measuring altogether, our canvas prints are ready to hang as they are.
— Michelle
Prefer a ready-to-hang print instead of framing one yourself?
If the measuring, cutting, and hinging above feels like more than you want to take on, we get it. Sometimes the simplest path is starting with art that’s already sized and ready to go, especially if you’re framing something as a gift or want it on the wall this weekend.
- Our 8″ x 10″ prints fit standard frame sizes you can find almost anywhere
- Our mental health canvas prints skip framing entirely and arrive ready to hang
- Each piece carries a message meant to open conversations about mental health, not just fill wall space
Browse the full collection of Michelle’s artwork and find a piece that’s ready for your wall without the measuring tape.
FAQ
How can I frame my artwork?
Measure the image area of your print, cut or order an acid-free mat with an opening about a quarter inch smaller than the artwork on each side, and hinge the print to the mat using mulberry paper and wheat starch paste or archival photo corners. Layer glazing, the matted print, and a backing board into your frame, then secure it and hang with wire or D-rings depending on weight.
How much should I pay for a framed print?
Costs vary widely based on frame size, mat quality, and glazing type, with the mat board being the upgrade worth prioritizing first since it protects the print long-term. If you’d rather avoid the cost of custom framing altogether, ready-to-hang options like our canvas prints skip the framing step entirely.
What are the different types of picture frames?
Picture frames include ready-made frames sold at standard sizes, custom frames built to exact dimensions, and clip frames that use spring clips instead of a traditional frame structure. The right choice depends on your print’s size, how much depth you need for a mat and backing, and whether you want a conservation-grade setup or a simpler display.
How do I display unframed art prints?
Removable mounting strips or washi tape can hold a print directly to the wall without a frame, though this skips the protective layer a mat and glazing provide. For prints you want to preserve, framing with an acid-free mat remains the safer long-term option, even if it takes a bit more effort upfront.
Sources
For deeper technical detail, the Library of Congress and CCAHA publish conservation standards, while FramingMath offers precise measurement guidance for cutting mats correctly.
Recommended
Comments